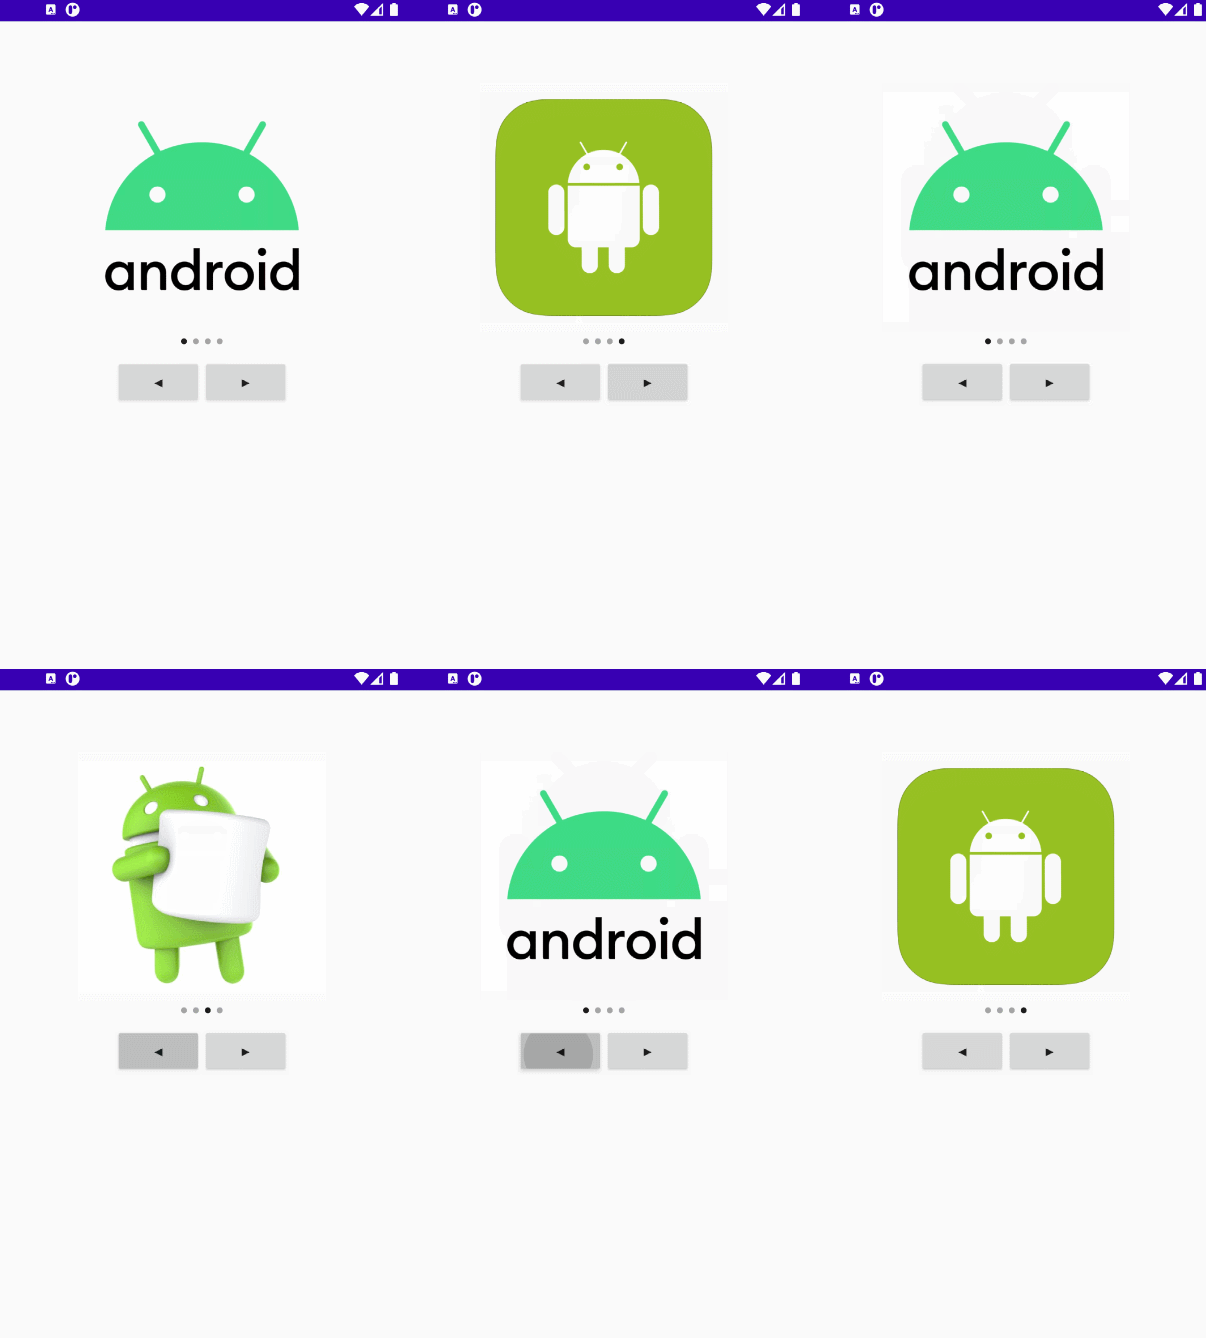
특정 팝업이나 공지사항 알림 등 앱을 개발할 때 여러 목적으로 항목을 표시하는 인디케이터를 사용할 때가 많다.
실습으로는 코드상에서 ImageView를 생성하여 추가한 후 LinearLayout에 추가하여 목적에 따라 구현하였다.
사용된 이미지와 인디케이터 drawable과 selector, dimen
xml
<?xml version="1.0" encoding="utf-8"?>
<androidx.constraintlayout.widget.ConstraintLayout xmlns:android="http://schemas.android.com/apk/res/android"
    xmlns:app="http://schemas.android.com/apk/res-auto"
    xmlns:tools="http://schemas.android.com/tools"
    android:layout_width="match_parent"
    android:layout_height="match_parent"
    tools:context=".IndicatorActivity">

    <!--콘텐츠를 표시할 리니어 레이아웃-->
    <LinearLayout
        android:id="@+id/img_container"
        android:layout_width="250dp"
        android:layout_height="250dp"
        android:orientation="horizontal"
        app:layout_constraintBottom_toTopOf="@+id/indicator_container"
        app:layout_constraintEnd_toEndOf="parent"
        app:layout_constraintStart_toStartOf="parent"
        android:layout_marginBottom="@dimen/d_7dp"/>

    <!--인디케이터를 표시할 리니어 레이아웃-->
    <LinearLayout
        android:id="@+id/indicator_container"
        android:layout_width="wrap_content"
        android:layout_height="20dp"
        android:layout_centerHorizontal="true"
        android:layout_centerVertical="true"
        android:orientation="horizontal"
        app:layout_constraintBottom_toBottomOf="parent"
        app:layout_constraintEnd_toEndOf="parent"
        app:layout_constraintStart_toStartOf="parent"
        app:layout_constraintTop_toTopOf="parent" />

    <LinearLayout
        android:layout_width="wrap_content"
        android:layout_height="wrap_content"
        android:layout_centerHorizontal="true"
        android:layout_centerVertical="true"
        android:orientation="horizontal"
        app:layout_constraintEnd_toEndOf="@+id/indicator_container"
        app:layout_constraintStart_toStartOf="@+id/indicator_container"
        app:layout_constraintTop_toBottomOf="@+id/indicator_container">

        <Button
            android:id="@+id/left_btn"
            android:layout_width="wrap_content"
            android:layout_height="wrap_content"
            android:layout_weight="1"
            android:text="◀" />

        <Button
            android:id="@+id/right_btn"
            android:layout_width="wrap_content"
            android:layout_height="wrap_content"
            android:layout_weight="1"
            android:text="▶" />
    </LinearLayout>

</androidx.constraintlayout.widget.ConstraintLayout>
Fragment, Dialog에 적용할 때도 많으나 실습으로는 Activity에서 진행하였다.
class IndicatorActivity : AppCompatActivity() {

    lateinit var indicatorContainer: LinearLayout       //인디케이터를 표시할 LinearLayout
    lateinit var contentsContainer: LinearLayout        //내용을 표시할 LinearLayout

    var drawableList: ArrayList<Int> = ArrayList()           //이미지 drawable 배열
    var imgUrlList: ArrayList<ImageView> = ArrayList()       //표시할 내용 배열
    var indicatorDotList: ArrayList<ImageView> = ArrayList() //인디케이터 배열

    var mCurrentPos = 0      //인디케이터 포지션 값

    override fun onCreate(savedInstanceState: Bundle?) {
        super.onCreate(savedInstanceState)
        setContentView(R.layout.activity_indicator)

        contentsContainer = findViewById<LinearLayout>(R.id.img_container)
        indicatorContainer = findViewById<LinearLayout>(R.id.indicator_container)

        drawableList = arrayListOf(
            R.drawable.and_1,
            R.drawable.and_2,
            R.drawable.and_3,
            R.drawable.and_4
        )

        left_btn.setOnClickListener {
            if (mCurrentPos > 0) mCurrentPos -= 1
            initIndicator()
            contentsContainer.removeAllViews()                     //표시되었던 콘텐츠를 레이아웃에서 삭제
            contentsContainer.addView(imgUrlList[mCurrentPos])     //콘텐츠 배열에서 선택된 position의 콘텐츠 표시
        }
        right_btn.setOnClickListener {
            if (mCurrentPos < indicatorDotList.size - 1) mCurrentPos += 1
            initIndicator()
            contentsContainer.removeAllViews()
            contentsContainer.addView(imgUrlList[mCurrentPos])
        }

        for ( i in 0 until drawableList.size){
            val imgView = ImageView(applicationContext) //표시할 이미지뷰
            imgView.setImageResource(drawableList[i])   //drawable 배열에서 순서대로 setResource
            imgView.layoutParams = LinearLayout.LayoutParams(LinearLayout.LayoutParams.MATCH_PARENT,LinearLayout.LayoutParams.MATCH_PARENT) //match_parent
            imgUrlList.add(imgView)                     //내용 이미지 리스트에 add
        }

        val indicatorDotSize: Int = resources.getDimensionPixelSize(R.dimen.d_6dp)  //인디케이터 크기 설정

        for (i in imgUrlList.indices) { //내용 이미지 리스트만큼 반복
            val dot = ImageView(applicationContext)

            //추가할 인디케이터 이미지 크기를 5dp로 설정
            dot.layoutParams = LinearLayout.LayoutParams(indicatorDotSize, indicatorDotSize)
            dot.setBackgroundResource(R.drawable.indicator_dot_selector)

            //첫번째 인디케이터가 아닌 경우 leftMargin 값을 설정한다.
            if (i > 0) {
                val params = dot.layoutParams as LinearLayout.LayoutParams
                params.leftMargin = indicatorDotSize
                dot.layoutParams = params
            }
            indicatorDotList.add(i, dot)
            indicatorContainer.addView(dot)

            //첫번째 인디케이터 경우 selected를 설정해서 색을 변경하도록 한다.
            if (i == 0) { dot.isSelected = true }
        }
        contentsContainer.addView(imgUrlList[0])
    }

    fun initIndicator() {
        for (i in imgUrlList.indices) {
            indicatorDotList[i].isSelected = mCurrentPos == i
        }
    }
}

이처럼 인디케이터를 구성해보았다.
주소 값 을 가지는 List를 만들어 Gilde 라이브러리를 써서 인터넷 상의 이미지를 표시하여도 좋고 꼭 이미지만을 표시할게 아니라 Fragment 변경에 적용하거나 VideoView를 넣어 List에는 표시할 비디오의 주소 값을 가지고 있고 선택되었을 때 주소 값으로 prepare 하여 비디오를 표시하여도 좋을 것 같다.
'Android > Reference' 카테고리의 다른 글
| ClickCountListener (특정횟수 클릭 리스너) (1) | 2021.12.10 |
|---|---|
| 화면켜짐/제어 (WakeLock, WindowFlag) (0) | 2021.11.24 |
| RecyclerView GridLayoutManager spansize 커스텀 (1) | 2021.03.26 |
| Android 현재/과거 날짜 시간 구하기 (SimpleDataFormat) (3) | 2021.03.04 |
| Floating Action Button (플로팅 액션 버튼) (2) | 2021.01.04 |
